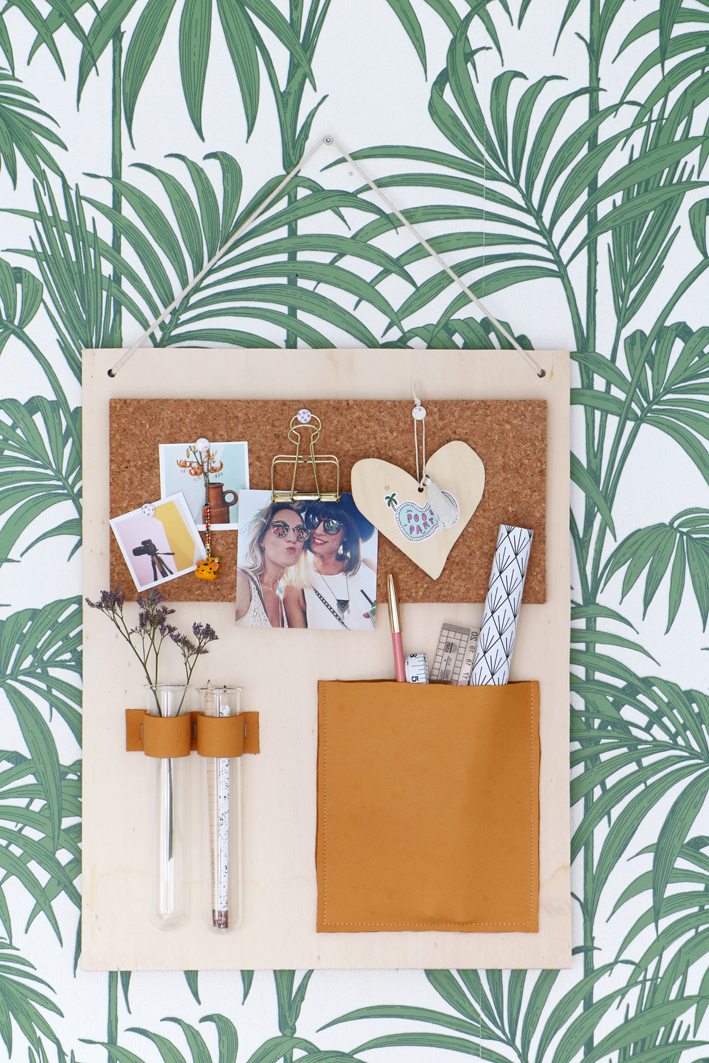
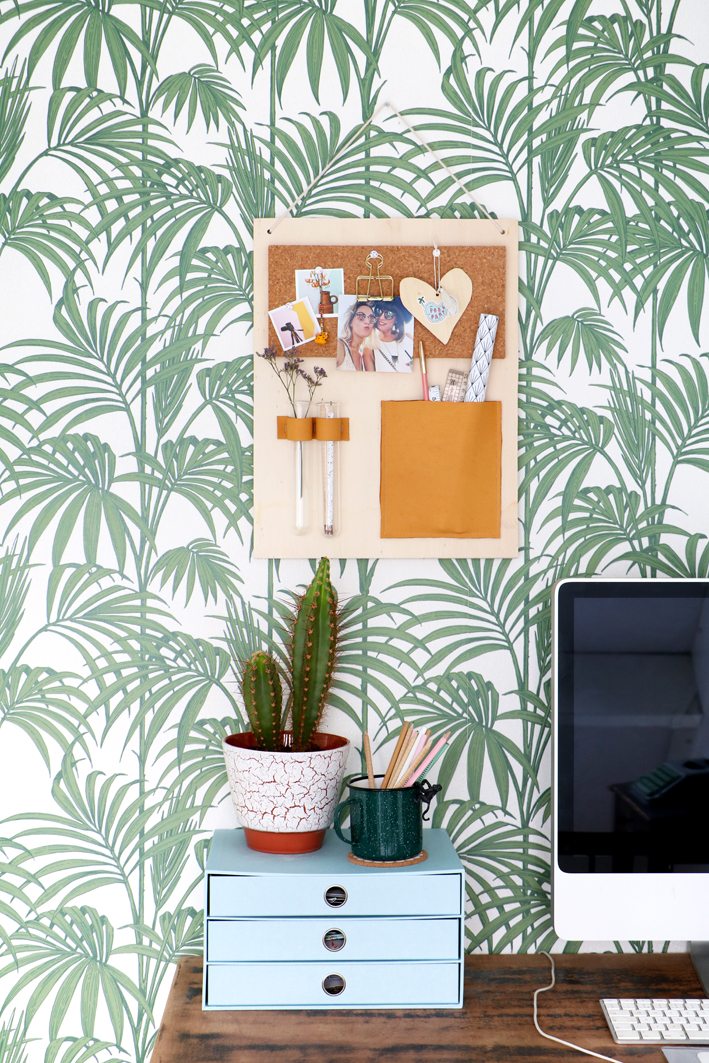
Spring has started and it always gives me energy to clean up and re-organize my home! You must recognize that urge to change things at home and get everything well organized again… For Fashionista magazine I made this DIY Organizer which can help you to get your home office nice and tidy. This is an organizer for your small stuff laying around your desk and since you can hang it on the wall it’s a bonus that it looks good as well right? Now that I think about it, the re-organizing started earlier at our home because a couple of months ago we changed a lot on the first floor at home… The workspace that you see on these pictures has now become our dressing room and my home office has moved to the former bedroom… Still working on these rooms as we speak so I’ll tell you more about that later! First, let me tell you how to make this fun organizer…
THIS IS WHAT YOU NEED:
– A cut to size wooden board
– Rope or cord
– A piece of thick cork
– A ruler and pencil
– Stanley knife
– Superglue
– Leather or some other firm fabric
– Scissors
– A sewing machine
– Tacker
– Glass test tubes
STEP 1:
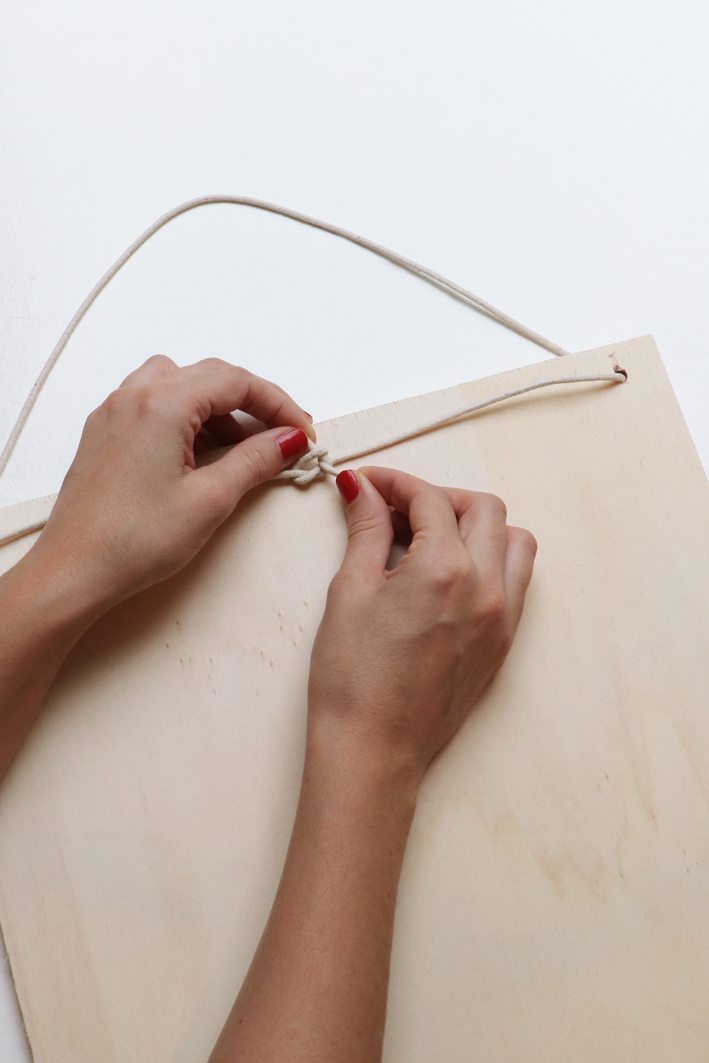
Think about the size you want your organizer to be and get a cut to size wooden board at the hardware store. Make two holes on every side (about 15 mm from the edge) with a wood drill and put the cord through the holes to make a knot on the back of the board.
STEP 2:
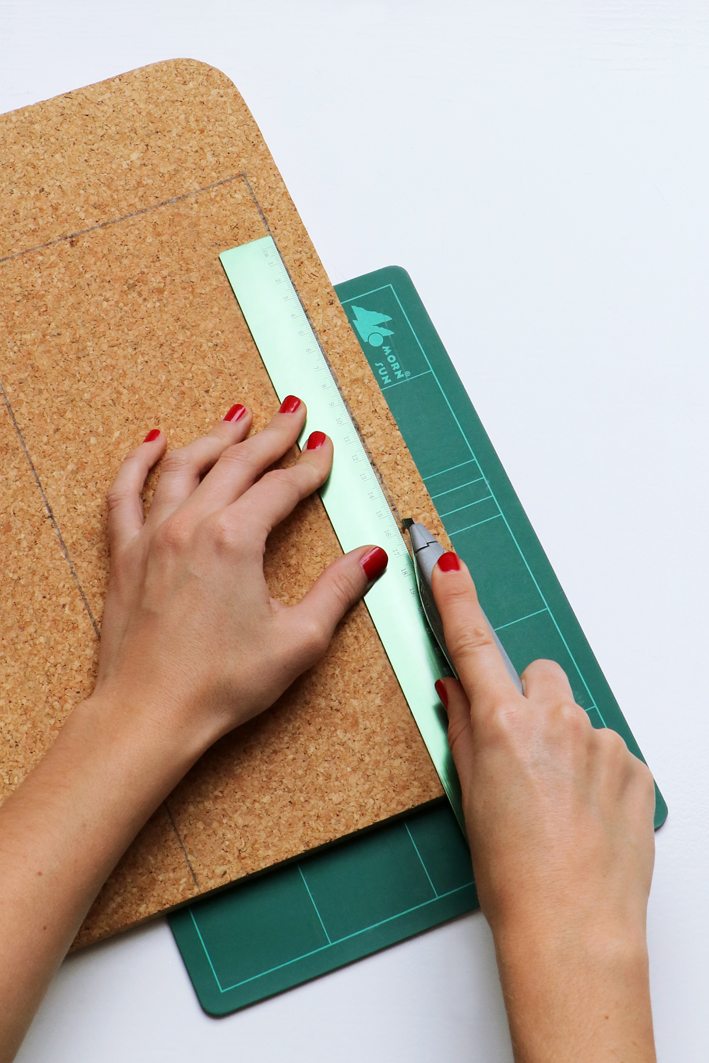
Measure out how big the piece of cork needs to be and mark it on the piece of cork. Use a sharp stanley knife to cut it out.
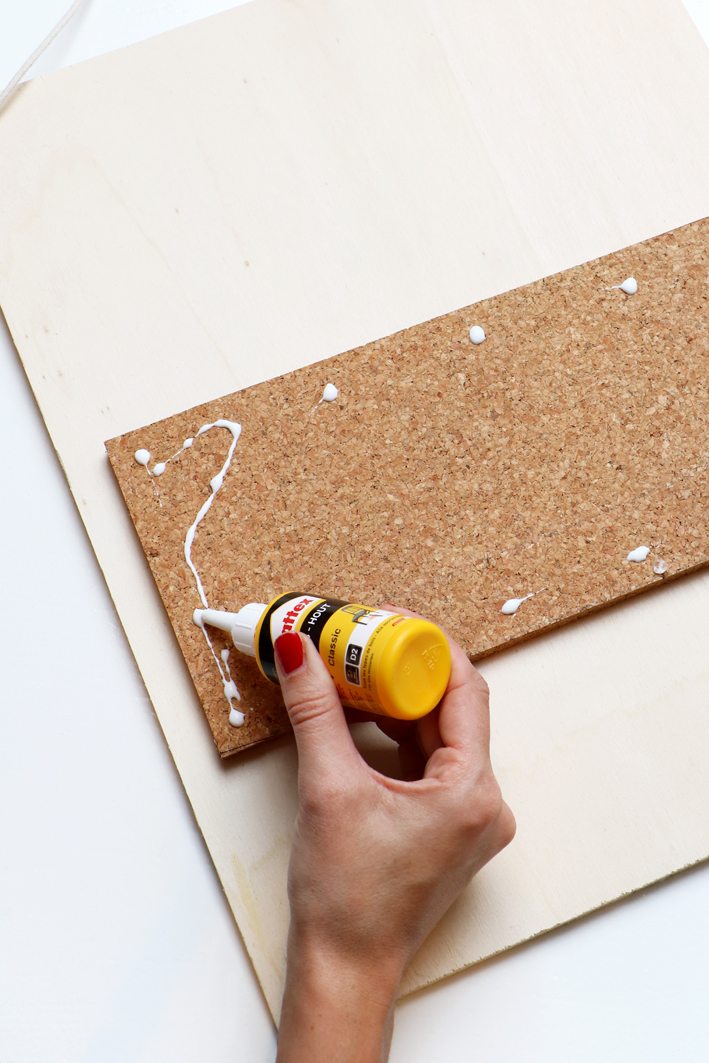
STEP 3:
Use superglue to attach the piece of cork to the wooden board. Keep on pressing during the drying process of the glue.
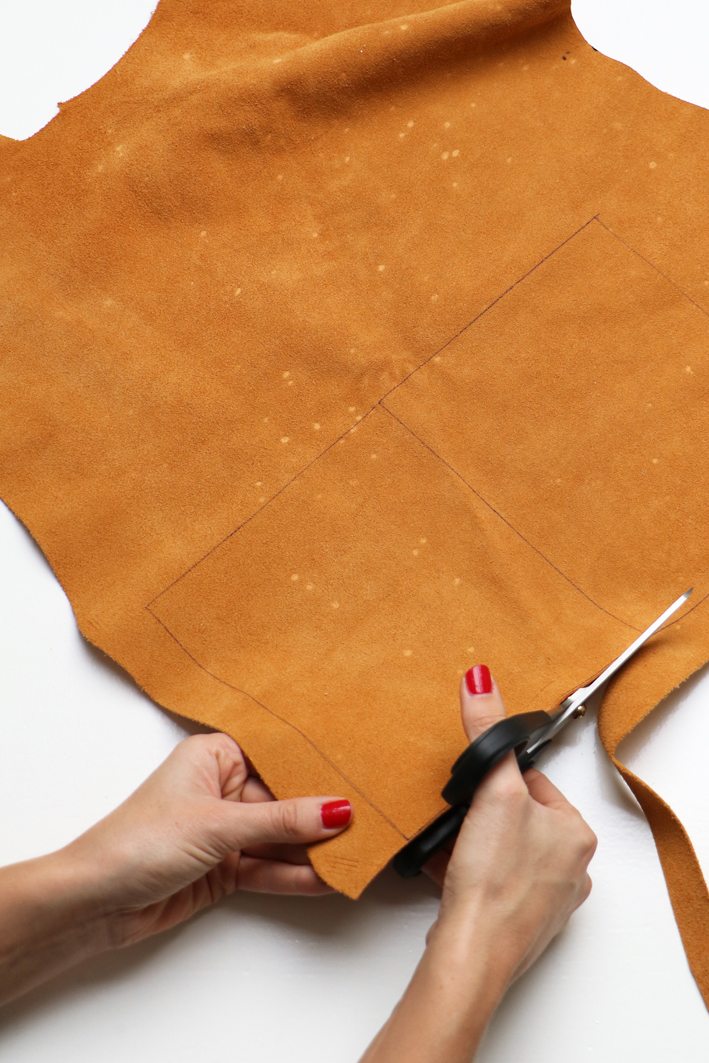
STEP 4:
To make the leather pocket, measure out how big you want it to be on the wooden board. Mark the measurements on the leather and cut out the same shape two times.
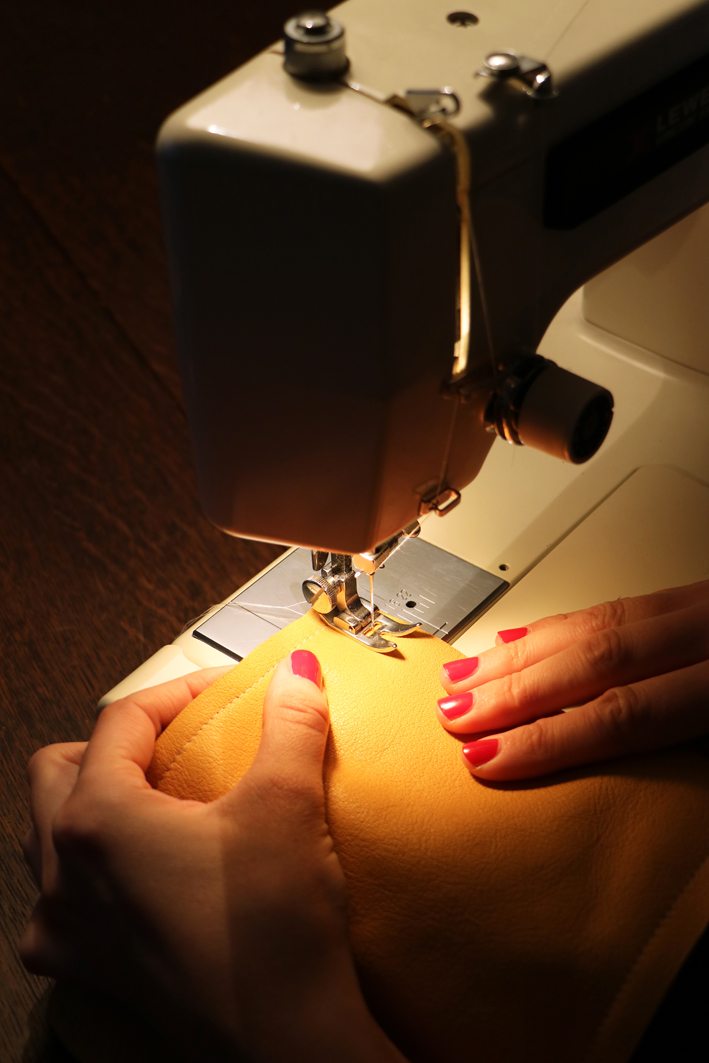
STEP 5:
Place the two pieces of leather on top of each other and sew them together leaving one side open.
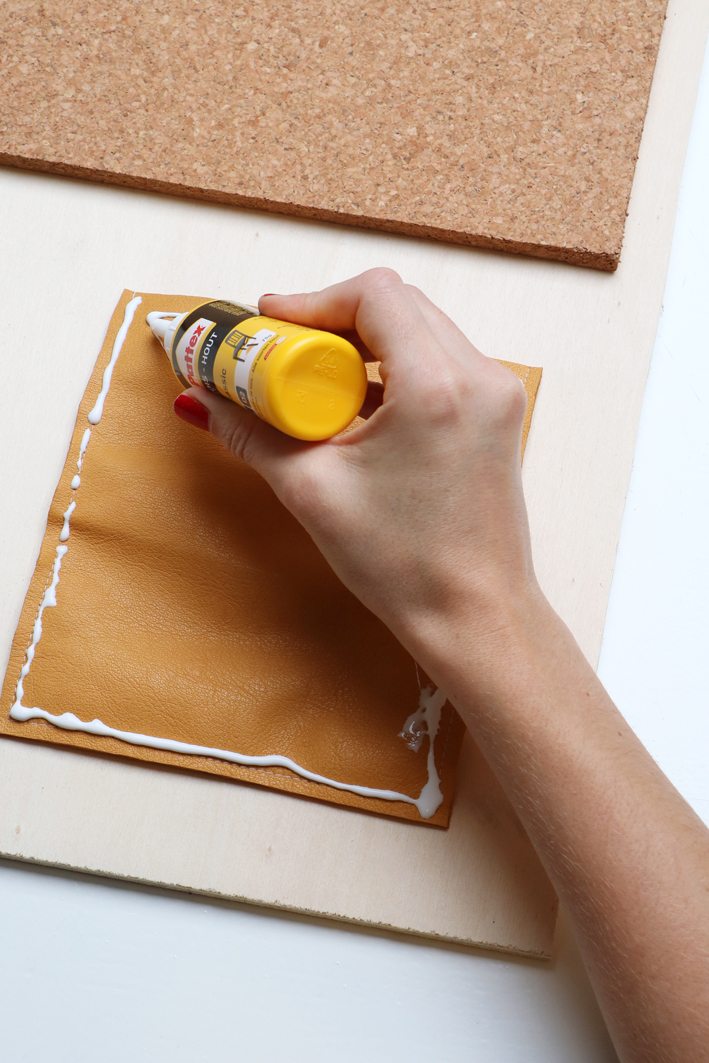
STEP 6:
Again use the superglue to attach the leather pocket onto the wooden board and press while drying.
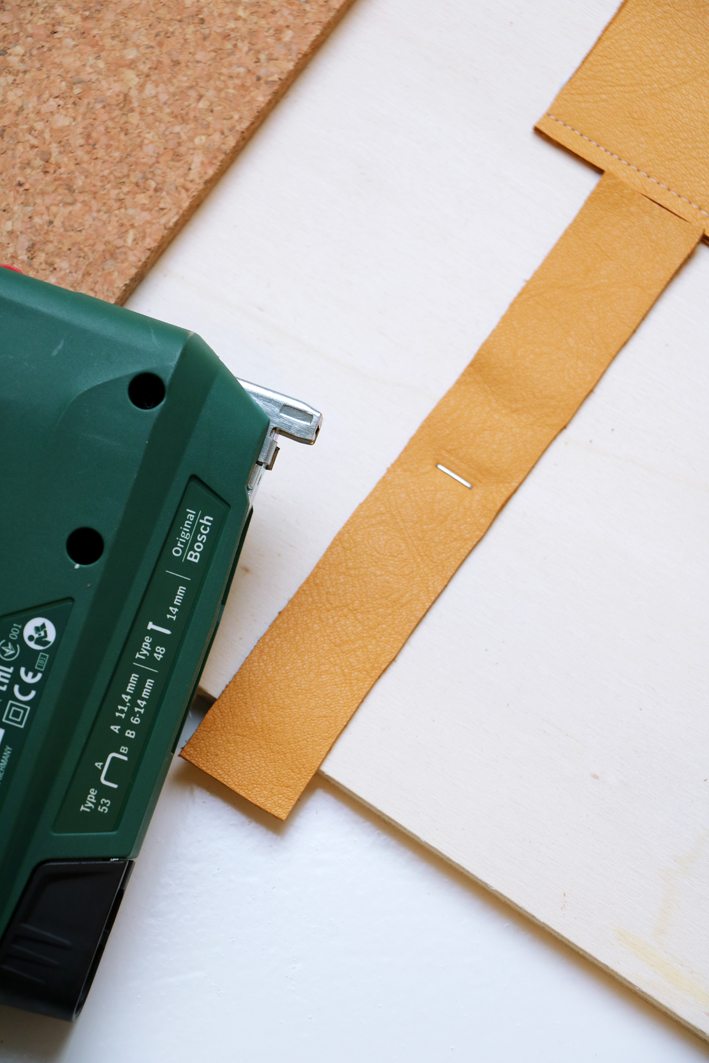
STEP 7:
Cut out a strap of leather to make a holder for the glass test tubes. Put the leather strap onto the wooden board where you want it to be and attach it with the tacker in the middle.
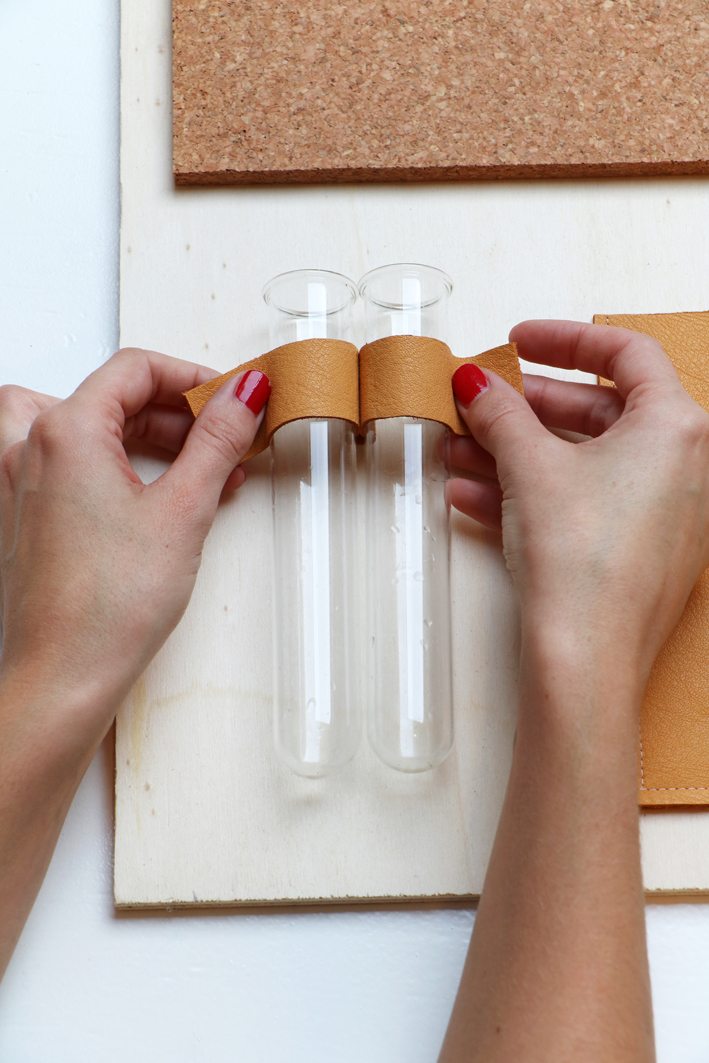
STEP 8:
Place the glass test tubes underneath the leather strap and attach the ends onto the board with the tacker. Now the test tubes won’t go anywhere and you can use them for pens, pencils or even some flowers! Enjoy getting organized!
Photography: Marij Hessel
2 replies on “DIY Organizer for Fashionista”
SierB
Heel erg leuk deze organizer! Ook erg mooi met dat leer.
Anouk
Leuk! Ik ben niet zo van het leer, maar ik vind het resultaat echt heel tof 😉